Pancake recipe | fluffy pancakes | how to make | amazing pancake

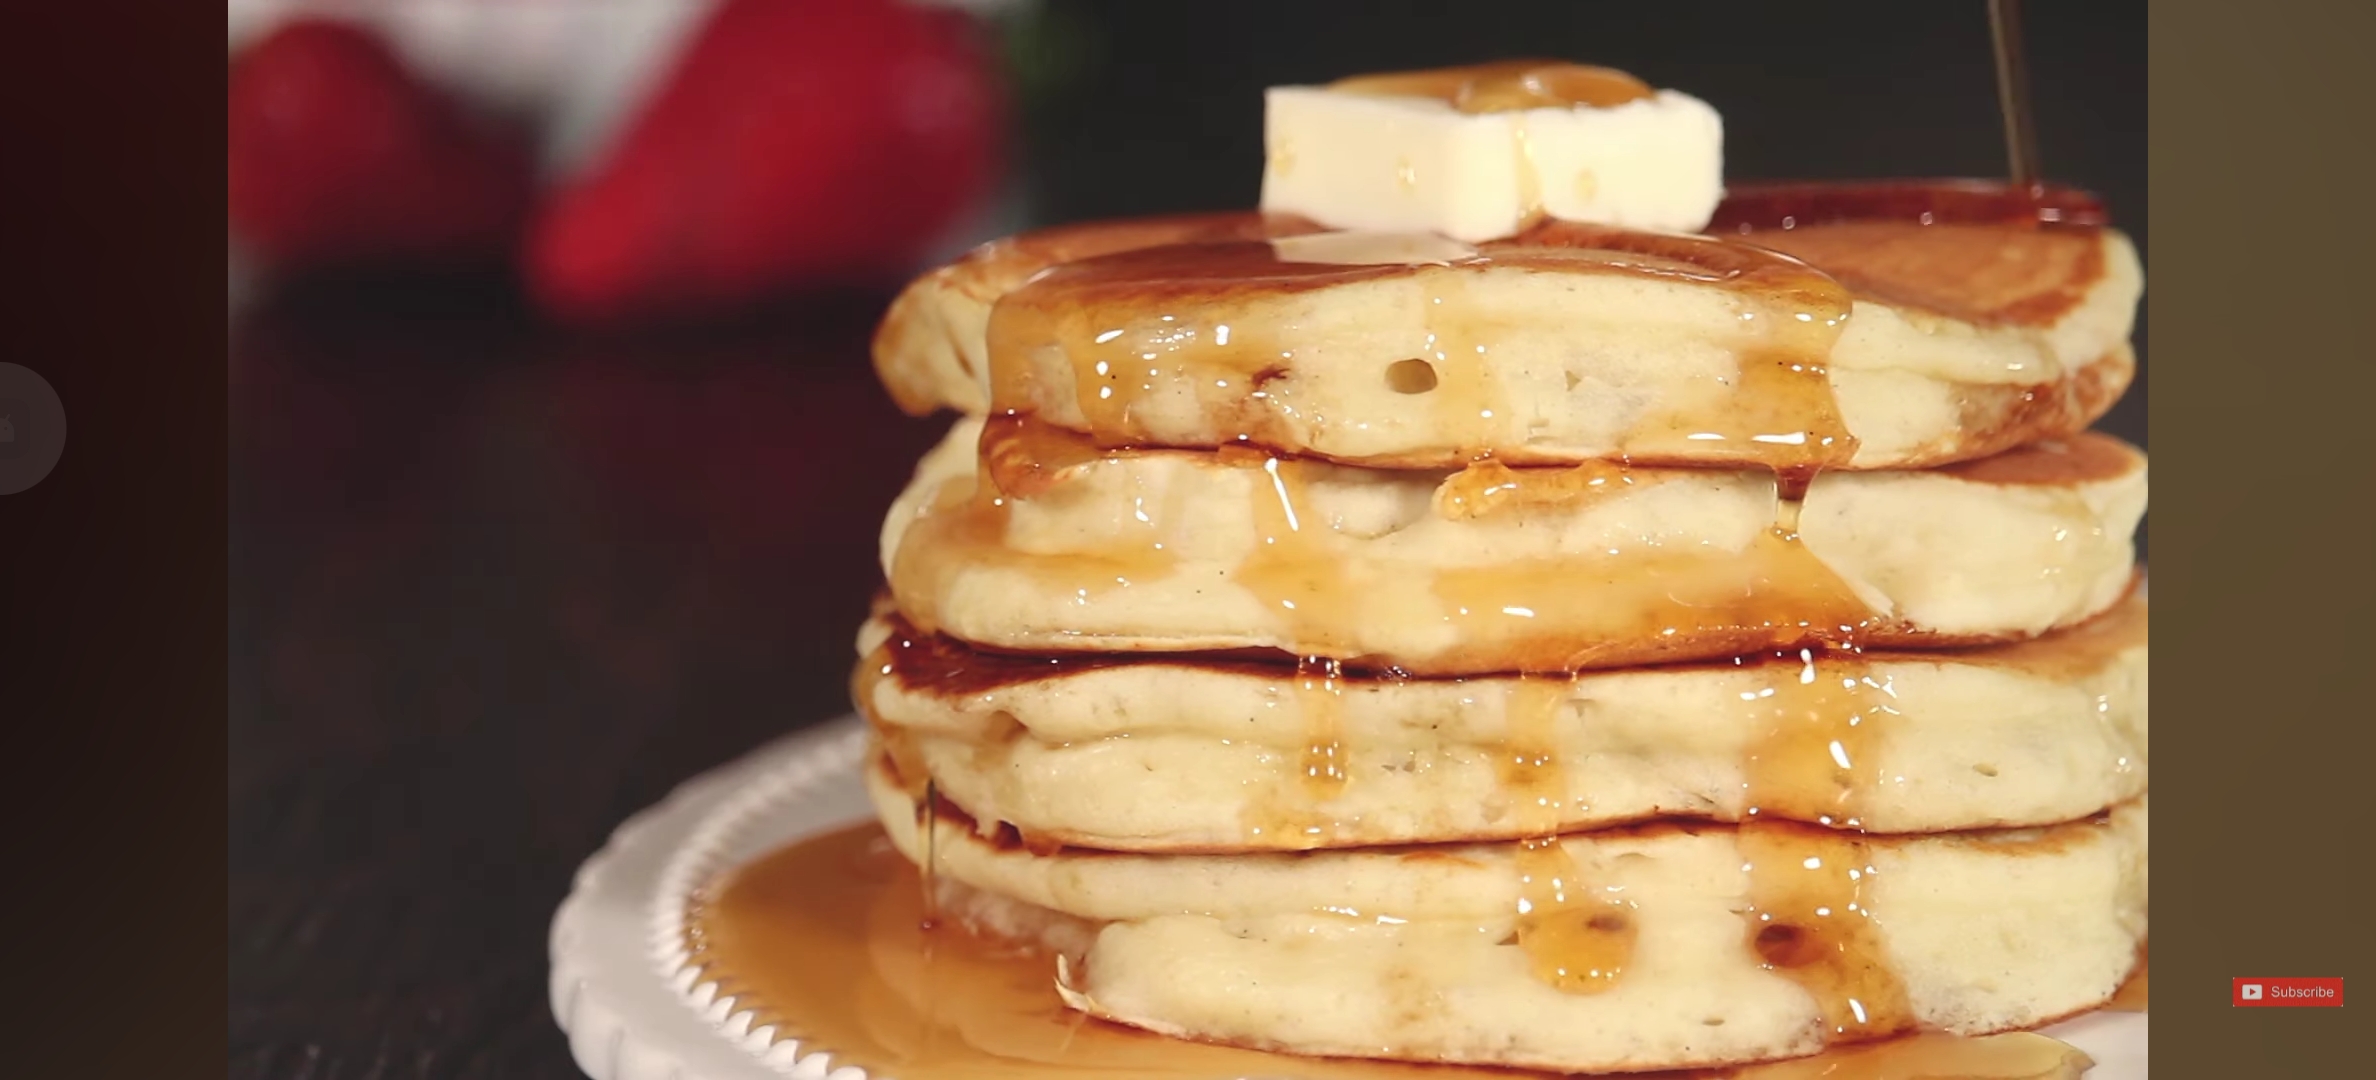
PANCAKE:- It is crispy from outside dipped with maple syrup , this is a amazing cake , it is flaten seems like fat chapati. This flat cake is make with milk , butter , sugar , flour , baking powder , baking soda , salt , maple syrup ,honey and butter. This cake is made both egg and eggless recipe, I have tried both pancakes seriously egg pancakes was amazing , but in this blog i am teach you the process of making best eggless pancake .I remember when i was working for a cafe , and sometimes i was making pancakes and we was using riped banna in pancake batter When we searching recipe for pancakes there is a lot of recipe but in some few chefs tells shape does not matter , but i think shape mattter because first impression is last impression. so when you are making any dishes it should be seems amazing . Making pancakes is not a big task , it is easy , only you should be needed to follow the correct process of making and you dont needed to worry about ingradients because all the pancakes ingradients is easily available in your kitchen . How to make the best pancake :- The best pancakes can be made by using correct ingradients and following the step by step process. Main ingradients for making best pancake :- Butter:- Butter is use for garnishing on top and enhence the taste and richness. Flour:- This is the main ingradient in making any pancakes . Milk:- It enhence the taste of the pancakes . Suger:- It makes the pancakes sweets and makes it moist. Vanilla essence:- Vanilla essence is used for enhence the fragrance the pancakes . Baking powder and Baking soda :-Baking powder and baking soda works as leavener agent makes the pancakes fluppy and flat. Salt:- Salt is a optional ingradients but using a pinch of salt in any sweet dish it act as a tadka. Making pancake from scratch:- It is very easy dish and it can be made easily by using correct recipe, and here i will explain the best way for making :- 1:- seive all the dry ingradients well 2:- Add little by little dry ingradients in wet ingradients and mix it gently. 3:- Put the batter on pan at exact temperature . 4:- Use non stick pan for making pancakes . 5:- Cook upto 3 minutes each side , untill becomes golden. When mixing the pancakes batter use two bowl seperetly one for dry ingradients and second for wet ingradients . And when mixing two mixture and the mixture is wet and dry then mix it gently dont overmix the batter , if you will overmix the batter, the the pancake will be flat and fluppy but not crunchy , same thing is happening when we making sponge or muffines . When flip the pancake while cooking:- mostly pancakes cooked in 5-6 minutes but when we put batter in pan then we should coook one side first untill edges becomes golden and and bubbles start at the surface of pancakes . if you are profesional in it then ok but if you not then you should use best non stick pan for cook the best pancakes. TRY MY BEST CHEESE CAKE LAVE CAKE CHICKEN BURGER pancakes varients:- With this one recipe we can make many varities of pancakes , because recipe is same only flavour will be change . these are the some best pancakes varients ……… blueberry pankes butter pancakes fruit pancakes chocolate pancakes Can we make pancake without eggs :- Yes , sure we can use baking powder and baking soda in place of eggs . eggs work as a rising agent and same thing baking powder and soda are doing . Recipe:- Flour :- 180 gm Sugar:- 20 gm Milk:-270 gm vinegar:- 10 ml Butter:- 40 gm Vanilla essence :- 1 tsp Baking powder :- 5 gm Baking soda :- 5 gm Salt :- little pinch Process of making :- 1:- First take two bowl one for wet ingradients and second for dry ingradients . 2:- In a bowl take whole milk at room temperature then add vinegar and mix gently for 1 minutes and keep it side for upto 10 minutes . 3:- Now add suger , melted butter and vanillla essence in it and mix well using wisk. 4:- Now in 2 nd bowl take seive flour, baking powder , baking soda and salt and mix well. 5:- Now Put the wet ingradients into dry ingradients and mix gently and dont over mix the batter , dont worry if there is a small lumps. 6:- Keep the pancakes for 10 minutes rest. 7:- Now take a non stick pan and grease the pan with butter and pour The batter in it. 8:- Now first cook the pancakes from one side untill becomes golden and crispy then flip it . 9:- Now makes 4-6 pancakes for one pancacakes . 10:-Now pour the maple syrup or you can use honey. 11:- Serve it hot…….. CAN WE KEEP PANCAKE BATTER FOR NEXT DAY Yes we can keep the pan cake batter in refrigrator for next days , but need to keep in refrigator in air tight container. CAN WE REFRIGRATE PANCAKES Yes we can refrigate pancakes for upto 1 month , but need to follow the way of refrigating keep butter paper between pancakes and so they dont stick to one another . HOW TO USE REFRIGATED PANCAKES Simply for this use microwave for 15 to 20 seconds or wrap the pancakes with silver foil and put it in oven 350 F for 10 minutes for best result. WHAT WE CAN USE FOR TOPPING OF PANCAKES I am using honey and fruits for toppping the pancakes . NUTRITION PER SERVING SERVING SIZE  1 pancake / Calories 184 / Protein 4.5g / Carbohydrate 23.8g / Dietary Fiber 0.7g / Total Sugars 5.2g / Total Fat 7.8g / Saturated Fat 4.5g / Cholesterol 42.3mg / Sodium 173.5mg

Read More

Gajar halwa ,Carrot halwa, How to make , tasty and delicious

Gajar halwa:- Gajar halwa is an Indian cuisine dessert. gajar halwa is made with carrot , milk and sugar . For making halwa delicious and tasty we uses khoya , milkmaid and dry fruits. Halwa is served after food. Carrot halwa is made in two ways. The first one is made by grating the carrot and the second one is made by cutting the carrot and cooking it with with. Hawa is an Arabic name, but Hawa is made on every festival in India. Carrot halwa Gajar ka halwa is very famous in the Punjab side area and is made here every day. It is also known as Gajrela. Making carrot halwa is quite easy, but to make it one has to follow its recipe exactly. If you want, you can make it using just three ingredients but some people use khoya milkmaid in it. Like Halwa is a very tasty and cheap sweet which is very easy to make and takes less time and those who make it regularly can make it more easily. Carrot Halwa is a favorite for breakfast.If carrot halwa is prepared properly, it can be eaten by keeping it in the refrigerator for at least 15 days. What is halwa:- Halwa is an Arabic word. And it means sweet.Whatever things are cooked with sugar and milk is called halwa like moong halwa, semolina halwa, carrot halwa, beetroot halwa.It is not necessary to use milk to make halwa. A wonderful kind of halwa can be made by using water also.And in India, almost every halwa is made by adding sugar water and the thing to be made halwa and then cooking it. Tips for making carrot halwa:- BEST CHESSE CAKE RECIPE ROMANIAN CHEESE CAKE COLD CHEESE CAKE Recipe Carrot halwa :- Ingradients:- Carrot:- 2kg Ghee:- 1 tsp Milk:- 1ltr Cashewnut:- As required Almond:l kesar:- few therds suger:- 1cup pistachio:- As required Process of making:- 1:-First of all dust the carrots well and cut off the bottom part. Then peel it thoroughly. 2:- Now grate the carrots with the help of a grater. 3:- Now take a cooker and put ghee in it, then add milk in it and boil it. 4:- When the milk starts boiling, add grated carrots to it. 5:- Adding carrots to cold milk may cause the milk to curdle. 6:- If you are using a cooker then you can cook it for two whistles. 7:- Now take it out of the cooker and put it in the pan and cook it until the milk thickens/ reduced. 8:-When it become thicker then add sugar and cook for 10 minutes . 9:-Now add chopped cashews , pistachio and almonds . 10:- Now garnish the halwa with irani pistachio. and serve hot…. MOST SEARCHED RECIPE ON INTERNET CUPCAKE RECIPE Recipe carrot halwa with khoya INGRADIENTS:- Carrot:- 1.5 kg sugar:- 250 gm milk:-500 ml khoya:- 300 gm Ghee:- 100 gm Dryfruits:- 250 gm Process of making:- 1:-First of all dust the carrots well and cut off the bottom part. Then peel it thoroughly. 2:- Now grate the carrots with the help of a grater. 3:- Now take a pan and put ghee in it, then add milk in it and boil it. 4:- When the milk starts boiling, add grated carrots to it. 5:- Now cover it for 3-5 minutes , and cook it at medium flame untill milk reduced . 6:- Now add sugar and cook it for 20 minutes . 7:- Now add khoya and roasted dryfruits and mix well and cook it for 5 minutes. 8:- Now garnish with irani pistachio and serve hot. TRENDING RECIPE

Read More

Choco lava cake | How to make| delicious and impressive

Choco lava Cake :- Choco lava cake is the one of the best american cuisine dessert, this dessert is the best dessert for impress someone with chocolate. This is a unbelieveble dessert it seems like a cooked cake but it is full with lava inside it , when we crack it with spoon waaaw a amazing melted chocolate coming out. seriously when i made it first time i never exepected when i crack it a rich melted chocolate will come out. this amazing choco lava cake can be ready in within 25 minutes , and if making this with proper way it can be stored in refrigrator upto 4 month, and for serving microwave it as required . This amazing dessert can be made at any occassion and using homely ingradients .The best indivisual dessert This is slightly undercooked unbelievable dessert are easy to make at home. This is chocolate lover dream cake . hey i am chef gulshan and in this blog i will learn you how to make this amazing desert at home with step by step process so get in this blog…. Try my best baked cheese cake , Romanian cheese cake Ingradients for making Lava cake BUTTER:-Always use the unsalted butter for best taste . CHOCOLATE:- Use full sweetend chocolate for perfect and tasty lava cake, When i am making lava cake i uses full dark chocolate cake , because it taste is feels amazing . EGGS :- The eggs makes a great role in making any cakes or any dessert, eggs makes the cake extra richness andextra creaminess FLOUR:- The work of flour is making the structure ok the cake . Cold coffee recipe Course , Calorie , and baking time and temperature :- Cuisine :- American Catagory:- dessert Preparation time :- 10 minutes Cooking time :- 8 minutes Cooling time :- 2 minutes Total timing :- 20 minutes Calories:- 383 Kacl per serving Ingradients :- Butter:- 226 gm Chocolate:- 350 gm Eggs:- 4Nos Egg yolks:- 4 nos Sugar:- 100 gm Salt:- 2 pinch flour;- 50 gm Coffee powder :- As required ( optional) Process of making :- 1:-First ready the lava cake mould . 2:- Now in bowl take butter , dark chocolate and coffee , and melt it using microwave or at double boiler and melt it . 3:- Now in stand mixer bowl take egg and salt beat it at fast speed. untill it becomes peaks forms . 4:- Now add melted chocolate in it and fold it using spetula , 5:- Now add all purpose flour and fold using spetula . 6:-Now pour the Batter in baking mould and bake it at preheated oven at 200 degree celcius for 8 minutes 7:- Cool it for 2 minutes and serve it warm . 8:- Put it in mould and dust with icing sugar or serve with vanilla ice cream .

Read More

Ghewar recipe, How to make , best Recipe , 3 Ingradients

About Ghewar Ghewar is a very famous dessert in Rajasthan , India . Ghewar is such a dessert that one feels happy just by seeing it. The net made in ghewar is also a kind of art. Looks exactly like a beehive? It is a famous desert of Rajasthan in round shape. To make which ghee, flour, water and ice are required. At first, you will not even believe how it could become like this. When it is cooked on high flame and it starts to take the form of a honeycomb, then when it comes out after cooking, it looks very different. The method of making ghevar is also unique and after it is made, it is dipped in sugar syrup and garnished with dry fruits or rabri or sweets. So friends , today we will make ghewar and will teach you . How to make ghewar and how to make ghewar in many flavoures . Stay tuned in our blogs . Everyone has their own way of making it. Some people make special rings for this, in which they make different designs of ghevar. Today’s Ghevar recipe, it is a very common recipe because it is the country of Rajasthan, so many outsiders do not know about it and it is very easy to make. No machine is required to make it. Very few things are used to make it, like we need flour, water and ghee to make it, and for its smoothness, we can use rabdi or sweets or dry fruits etc.So you would think that how can we store ghevar, it is simple. In big places, it is first made and kept. Or where ghevar is more sold, its base is pre-made and according to the demand of the customer, it is dipped in sugar syrup and after that it is garnished with rabri sweets and nuts. Once the base of Ghevar is prepared and kept in a clean container, it will not spoil easily for about 1 month. And if the base is ready, then whenever you feel like eating ghevar, you simply take out its base and then dip it in a wire sugar syrup and serve it by adding rabri or nuts or sweets. This dish is very popular on the Delhi side during the festival of Raksha Bandhan or Teej. COCONUT MARY BERRY CAKE BAKED CHEESE CAKE BANANA PUDDING MOON SHINE RECIPE Tips for making ghever:- Time ,duration and Temperature , origin Preparation Time: 15 minutes Cooking time: 30 minutes topping and decoration : 15 minutes Baking Temperature: 200 degree celcius Origin : Rajasthan (India) Ingradients: For ghever crust: Ghee: 100 gm Ice cube: as required All purpose flour: 500 gm Lemon juice: few drops Water :- As required For Sugar syrup: Sugar: 200 gm Water: 60 ml Topping and garnishing: Rabri, rasmalai, custard , whipping cream , pastry cream Pista , almond , cashewnut , honey etc. Process of making:- With picture 1:- To make sugar syrup of one string, take a pan. Will put sugar water in the pan. Now cook till a syrup of one string is formed 2- So, to make it batter, first of all, we will take a flat round plate . 3:- Now put melted ghee in it and rub it well with an ice cube, until it become very thick creamy. 4:- When it becomes completely creamy, add flour little by little and mix it. Take care that there are no lumps in it . 6:- Now add water to it and mix it well. Take care not to get lumps in it. Ghewar recipe 7:-Now strain the batter. 9:-Now our batter is ready, Now we cook it. 10:- For cooking Ghever we take a flat pan, Use ghee for cook it.The oil for ghevar should be very hot. 11:-Some people make it into a ring. Some people make it in embroidery so it depends on you which shape you want to make? Whenever I make Ghevar, I use the ring for that. 12:- Now you can use many methods to pour the ghevar batter in the pan because some people pour it little by little with a spoon. I grab a bottle when I make. I make a small hole in the lid of the bottle and pour it little by little.You have to pour little by little in 10 to 12 times until it becomes in the shape of a honeycomb. When it becomes golden brown, now Remove it. 13:- Now drip the ghever base into the sugar syrup, and hang it for some times . 14:- Now garnish the ghever with rabri , custard or with whipping cream and serve this amazing dessert.

Read More

Banana pudding, Moonshine recipe, How to make ,7 ingredients

Banana pudding:- Banana pudding is a dessert from the southern united states made with vanilla custard ,cookies and fresh banana.In the United States, pudding is made from fruit juice and milk. Cornstarch, arrowroot or egg is used to thicken it. It is usually associated with dishes from South America, but it is found all over the country. Looks like an English triffle. Because there are many layers in this too. And for this we use custard fruit and whipped cream. Some people also use sponge to make it. Pudding is a delicious dish filled with full cream, which people use after eating. Some people also add custard powder to milk to make it. Also read this:- coconut cake recipe Story of banana pudding :- According to Robert Maas, an American author who writes for Serious Eats, the first mention of banana pudding was found in 1878. And its official recipe was published 11 years later in Good Housekeeping. Ingredients used in banana pudding:- .Today’s Banana Pudding recipe is going to be made very easily and by using home ingredients. How to make Banana pudding :- In today’s own recipe, we will teach you how to make Banana Pudding step by step. We will also tell you how it is made in a homemade way.So here is some information that when a cook makes banana pudding then all these things have to be done. 1:- Mix the custard powder in milk and whisk well 2:- Mix condensed milk and vanilla essence well and keep in refrigerate 3:- Fould the custard in whipping cream. 4:- Now make a lyer like English triffle . Read this also: Baked cheese cake How to store banana pudding :- Storage And Make -Ahead tips :- Banana pudding If whenever you are making Banana Pudding then try to finish it within 2 days.Because by keeping it in the refrigerator for 2 days, the moisture of the banana will be lost and the banana will dry completely and its color will also change or turn black.This will happen with cookies too, cookies will also become soft. And it will not be fun to serve pudding with soft ccokies, so try to finish the pudding within 2 days, and make daily Once after making Banana Pudding, keep it in deep freezer or in normal freezer and serve it within 2 to 3 days At the time of serving. Pudding must be very cold Ingradients:; For Making banana pudding Ingredients weight Milk 240 ml Instant custard pie 140 gm condensed milk ( optinal) 380 gm Vanilla essence 2 tsp chilled whipped cream 350 gm vanilla cookies 500 gm Banana According to taste Process of making:- 1:- First of all take all the ingredients. 2:- Now add milk, custard powder, and condensed milk in a ball and mix it with the help of a whisk for 5 minutes, untill smooth. 3:- Now put the custard in the whipped cream and mix it well. 4:- Now make a layer of cookies in the bottom layer in which you want to make banana pudding, then put banana slices on top of the cookies, now put custard cream on it. Banana pudding 5:- Follow the same process , and make atleast three layer . 6:- In the last decorate it by putting crushed cookies and banana slices on it. 7:- Now refrigerate it and serve chilled REad this also:- Best redvelvet cake Banana pudding Nutrition Facts:- (190 gm Serving) Calories 295 gm Total fat 8gm saturated fat 2.3 gm cholesterol 67 mg sodium 246 mg Total carbohydrates 53 gm Dietary fibre 1.7 gm sugar 36 gm protein 5.1 gm Vitamin D 0.4 mcg calcium 80 mg Iron 1 mg How to keep bananas from turning brown in banana pudding The banana which is used to make banana pudding, after some time its color starts turning brown, so to prevent it from turning brown, we put a little lemon juice on it and slow down the speed of its browning. can do. How to serve banana pudding:- Before serving Banana Pudding, it should be made in a very chilled and proper way, so that the taste is better known on eating. Useful tips:-

Read More

PEANUT BUTTER PARIS BREST, HOW TO MAKE

PEANUT BUTTER PARIS BREST Recipe Information Makes 6 pastriesPrep Time: 10 minutesCook Time: 30 minutes Will keep in fridge for up to 2 days if wrapped. • Ingredients • Praliné Peanuts (makes about 2 cups):(30 mL) water1 tsp lemon juice or white vinegar(100 g) granulated sugar(270 g) whole toasted & unsalted peanuts Diplomat Cream:granulated sugar: 140 gcornstarch: 30 g 2% milk: 500 mL large egg yolks: 6 nosunsalted butter, cut into pieces: 60 gvanilla extract: 2 tspgelatin powder: 7 g cold water: 30 mLsmooth peanut butter: 187 g whipping cream: 250 mL Choux Paste:water: (60 mL) 2% milk(115 g) unsalted butter2 tsp granulated sugar½ tsp fine salt(200 g) all-purpose flour, sifted4 large eggs, at room temperature1 egg whisked with 1 Tbsp cold water Icing sugar, for dusting PROCESS OF MAKING Praliné Peanuts:1. Line baking tray with parchment paper or silicone mat. 2. Measure the water & lemon juice (or vinegar) into a saucepan, then add sugar. Boil over high heat without stirring, and uncovered, until sugar reaches 240°F (116°C) on a candy thermometer. 3. Remove the pot, stir in the peanuts to coat them, then return the pot to the high heat. Stir until the sugar turns a rich amber colour. Quickly scrape the peanuts onto the baking tray and spread them out. Cool the tray on a wire rack completely before using. 4. Chop the praliné by hand for larger pieces or pulse in a food processor for a finer praliné. Store the praliné in an airtight container in the pantry for up to 6 weeks. Diplomat Cream: 1. Whisk the sugar and cornstarch together in a large saucepan, then whisk in milk, followed by egg yolks. Place the butter and vanilla in a medium heatproof bowl and set a strainer on top. 2. Bring the milk mixture to simmer at just above medium heat while whisking constantly (but not vigorously), until it begins to bubble and is very thick (about 10 minutes). Pour the custard through the strainer, using the whisk to push through. Remove strainer and whisk custard until the butter has melted. 3. Stir the gelatin powder with cold water in a small dish and set aside for a minute. 4. Whisk the gelatin, then peanut butter, into the pastry cream. Place a piece of plastic wrap directly on the custard’s surface. Let cool until it reaches room temperature (about 90 minutes). 5. Using a whisk, or stand mixer with whip attachment, whip the cream until it holds a soft peak. Add cooled custard all at once and fold in until incorporated. Cover and refrigerate until set (at least 2 hours). Choux Paste: 1. Bring water, milk, butter, sugar and salt to simmer in a medium saucepan over medium-high heat. Reduce heat to low and stir in flour with a wooden spoon, stirring vigorously until the dough no longer sticks to sides of the pot. Scrape into a large bowl. 2. Using electric beaters, or stand mixer with paddle attachment, beat paste at medium speed for a minute or two to cool. 3. Break four large eggs into a bowl and whisk to blend a little. Add a third of the eggs to the flour mixture while beating at medium speed, and mix until blended, scraping down the sides of the bowl. Add remaining eggs in two more additions, blending and scraping the bowl after each addition, until a smooth paste. Work with the choux paste while warm. 4. Preheat oven to 400°F (200°C). Trace six 3½-inch (9 cm) circles onto parchment paper. Turn the sheets upside down (marker lines face down) onto baking tray. 5. Spoon the choux paste into large piping bag fitted with large plain or star tip. Pipe paste rings following the traced lines, then pipe a second ring inside the first rings. Pipe a third ring over the seam where the two bottom rings meet. Brush the Paris-Brests with the whisked egg. 6. Bake the pastry rings for 15 minutes, then reduce the oven to 375°F (190°C) and bake for another 12 to 15 minutes, until a rich golden brown. 7. Let the pastries cool on the tray on a rack for 10 minutes, then gently lift them off the tray to cool completely on the rack before filling. 8. Slice each choux ring in half horizontally. Fit a large piping bag with a large star tip and fill with the chilled diplomat cream. Pipe generous dots onto the bottom half of each choux ring. Sprinkle with the chopped peanut praliné. Set the top half of each choux ring on the filling and gently press it in place. Dust generously with icing sugar and chill until ready to serve. THANKS FOR VISITING

Read More

BANANA CARAMEL TART, HOW TO MAKE

BANANA CAREMAL TART INGRADIENTS: CARAMEL WHIPPED CREAM : FRESH CREM : 90 GM GLUCOSE SYRUP: 25 GM CASTER SUGAR: 85 GM UNSALTED BUTTER: 60 GM GELATIN : 2 GM FRESH CREAM : 250 GM PROCESS OF MAKING : 1. FIRST IN A MEDIUM PAN WE TAKE 90 GM FRESH CREAM AND GLUCOSE SYRUP AT MEDIUM FLAME AND BRING TO A BOIL AND THEN KEEP ASIDE . 2. IN ANOTHER PAN PUT HALF SUGAR AT MEDIUM FLAME , AND MELT THEN ADD BALANCED SUGAR NOW ADD HOT CREAM AND MIX WELL. 3. NOW ADD BUTTER AND MIX WELL AND COOK IT AT 120 DEGRE CELCIUS .NOW REMOVE FROM FLAME AND ADD 250 GM OF FRESH CREAM AND BRING TO BOIL. 4.NOW OFF THE FLAME AND ADD GELATIN AND MIX , NOW STRAIN THE CARAMEL AND COVER WITH PLSTIC WRAP. TART: FLOUR: 250 GM ICING SUGAR : 90 GM ALMOND FLOUR : 50 GM SALT: 1 PINCH BUTTER: 120 GM EGG: 1 NOS VANILLA ESSENCE : FEW DROPS 1: IN STAND MIXER TAKE BUTTER AND SUGAR AND MIX USING PADDEL UNTILL SUGER MELTED . 2.NOW ADD EGG AND MIX AT MEDIUM SPEED , NOW ADD FLOUR , ALMOND FLOUR , SALT , AND VANILLA ESSENCE AND MAKE A SMOOTH DOUGH . 3 NOW ROLL THE DOUGH AND MAKE A SHEET AND CUT ACCORDING TO YOUR MOULD , AND PUTS SOME NUT BEFOUR BAKING , BAKE IN PREHEATED OVEN FOR 10 MINUTES AT 170 DEGREE CELCIUS 4. AFTER BAKE REMOVE THE NUTS AND DEMOULD THE TART. BANANA CREAM: BANANA PUREE: 150 GM GELATIN: 2 GM WHITE CHOCOLATE : 72 GM FRESH CREAM : 80 GM 1. FOR MAKING BANANA CREAM IN A PAN TAKE BANANA PUREE AND LEMON JUICE , COOK AT 40 DEGREE CELCIUS ADD THE GELATIN TO DESSOLVE. 2.NOW POUR THE PUREE OVER THE MELTED CHOCOLATE AND MIX WELL. 3. NOW ADD COLD FRESH CREAM AND PROCESS WITH A HAND MIXER TO HOMOGENIZE CARAMELIZED BANANA: BANANA: 2 PCS SUGAR: 60 GM UNSALTED BUTTER: 60 GM 1 CUT THE BANANA IN ROUND SLICES , 2. TAKE PAN AT MEDIUM HEAT ADD SUGAR AND WAIT UNTILL CARAMELIZED AND ADD SLICED CUT BANANA AND COOK FOR ONE MINUTES . PROCESS OF MAKING: 1. ARRANGE THE CARAMELIZED BANANA SLICES IN THE TARTLETS . 2. NOW FILL THE TART WITH THE BANANA CREAM. 3.NOW BEAT THE CARAMEL CREAM IN MEDIUM PEAKS, AND PIPE CARAMEL CREAM ON TART, NOW GARNISH WITH CARAMEL PIIECES AND FEUILLETE PAILLETE. SERVE AND ENJOY THANKS FOR VISITING

Read More

ROMANIAN CHEESE CAKE, HOW TO MAKE

Romanian Cheese Cake RecipeTo make a Romanian cheese cake, also known as “plăcintă cu brânză,” you will need the following ingredients: For the dough: 2 cups all-purpose flour1/2 cup unsalted butter, softened1/2 cup sour cream1 teaspoon baking powder1/4 teaspoon salt1 tablespoon sugar1 egg For the filling: 2 cups farmer’s cheese or ricotta cheese1/2 cup sugar2 eggs1 teaspoon vanilla extractZest of 1 lemon (optional) For the topping: 1 tablespoon powdered sugar (for dusting) Process of making Romanian cheese cake: 1. Preheat your oven to 350°F (180°C). In a large mixing bowl, combine the flour, softened butter, sour cream, baking powder, salt, sugar, and egg. Mix well until the dough comes together. You can use a spoon or your hands to mix the ingredients. 2. Divide the dough into two equal parts. Roll out one part of the dough to fit the bottom of a greased 9-inch (23 cm) round cake pan or pie dish. Set aside the remaining dough for the top crust. 3. In another mixing bowl, combine the farmer’s cheese (or ricotta cheese), sugar, eggs, vanilla extract, and lemon zest (if using). Mix until well combined and smooth. 4. Pour the cheese filling over the rolled-out dough in the cake pan. 5. Roll out the remaining dough to fit the top of the cake pan. Place it over the cheese filling, sealing the edges by pressing them together with the bottom crust. 6. Make a few small slits on the top crust to allow steam to escape during baking. 7. Bake in the preheated oven for about 45 minutes, or until the crust turns golden brown and the filling is set. 8. Remove the cake from the oven and let it cool in the pan for a few minutes. 9. Once cooled slightly, transfer the cake to a serving plate. 10. Dust the top of the cake with powdered sugar using a sieve or sifter. NOTE:- Allow the cake to cool completely before slicing and serving. Romanian cheese cake can be enjoyed warm or at room temperature. It is a delicious treat often served with a cup of tea or coffees Thanks for visiting

Read More

NO BAKED CHEESE CAKE, HOW TO MAKE

No Baked classic cheese cake Ingredients: Recipe:- 1 ½ cups chocolate cookie crumbs (such as chocolate graham crackers or chocolate sandwich cookies)1/4 cup melted butter16 oz (450g) cream cheese, softened1 cup powdered sugar1 tsp vanilla extract8 oz (225g) semi-sweet chocolate, melted and cooled1 ½ cups heavy cream, whippedOptional toppings: chocolate ganache, whipped cream, chocolate shavings, etc.Instructions: Possess of making:- No bake classic cheese cake 1:- In a bowl, mix the chocolate cookie crumbs and melted butter until well combined. Press the mixture evenly into the bottom of a 9-inch (23 cm) springform pan to form the crust. Place it in the refrigerator to chill while preparing the filling. 2:- In a large mixing bowl, beat the cream cheese until smooth and creamy. 3:- Add the powdered sugar and vanilla extract to the cream cheese, and continue to beat until well combined and fluffy. 4:- Gradually pour in the melted chocolate while beating the mixture. Mix until the chocolate is fully incorporated and the batter is smooth. 5:- In a separate bowl, whip the heavy cream until stiff peaks form. 6:- Gently fold the whipped cream into the chocolate cream cheese mixture until well combined. Take care not to overmix, as you want to maintain the lightness of the whipped cream. 7:- Pour the chocolate cheesecake filling onto the prepared crust, spreading it evenly. 8:- Smooth the top with a spatula and place the cheesecake in the refrigerator to chill for at least 4 hours or overnight to set. 9:- Once chilled and set, remove the sides of the springform pan. You can decorate the top with your desired toppings like chocolate ganache, whipped cream, or chocolate shavings. Slice and serve your delectable no-bake chocolate cheesecake! Enjoy! This no-bake version of chocolate cheesecake is rich, creamy, and perfect for those who prefer a chilled and hassle-free dessert Thanks for visiting

Read More

Classic baked cheese cake | How to make Cheese cake

Classic baked cheese cake: Ingredients: 2 cups graham cracker crumbs1/2 cup melted butter32 oz (900g) cream cheese, softened1 cup granulated sugar4 eggs1 tsp vanilla extract1 cup sour creamOptional toppings: fresh fruits, fruit sauce, chocolate shavings, etc. PROCESS OF MAKING CLASSIC BAKED CHEESE CAKE 1.Preheat your oven to 325°F (160°C). Grease a 9-inch (23 cm) springform pan with butter or cooking spray. 2.In a bowl, mix the graham cracker crumbs and melted butter until well combined. Press the mixture evenly into the bottom of the prepared pan to form the crust. 3.In a large mixing bowl, beat the cream cheese and granulated sugar together until smooth and creamy. You can use an electric mixer or do it by hand. 4.Add the eggs one at a time, beating well after each addition. Make sure each egg is fully incorporated before adding the next. 5.Stir in the vanilla extract and sour cream, and mix until all ingredients are well combined and the batter is smooth. 6.Pour the cheesecake batter into the prepared crust, spreading it evenly. 7. Place the springform pan on a baking sheet and transfer it to the preheated oven. Bake for about 60-70 minutes or until the edges are set, and the center is slightly jiggly. 8. Once the cheesecake is done baking, turn off the oven and leave the cheesecake inside for about an hour to cool gradually. This helps prevent cracking. 9. After an hour, remove the cheesecake from the oven and let it cool to room temperature. Then refrigerate it for at least 4 hours or overnight to set. NOTE:- Once chilled and set, remove the sides of the springform pan. You can decorate the top with your desired toppings like fresh fruits, fruit sauce, or chocolate shavings. Slice and serve your delicious homemade cheesecake! Enjoy! Remember, Classic baked cheese cake taste even better when chilled, so it’s recommended to refrigerate it before serving. Thanks for visiting FAQs

Read More